You might have run into this error when updating packages. The error is probably because you don’t have the public key corresponding to whatever private key the package was signed with. Hopefully, you can just download the public key from keyserver.ubuntu.com and get on with your day. In my case, it was a Google SDK key 8B57C5C2836F4BEB that was missing. Just use the following command, replacing the key ID with the key you need.
When you’re prompted to do so, pick gdm3 or lightdm display manager. I picked lightdm because it uses less resources. Here’s an article comparing the display managers.
Side note:
During installation, I got some errors.
Errors were encountered while processing:
avahi-daemon
libnss-mdns:arm64
avahi-utils
I found this article, but it didn’t help me. So I uninstalled and reinstalled everything thinking I could select gdm3 maybe not encounter the same issues, but it didn’t prompt me, and since it worked anyway, I didn’t bother figuring it out. If you know why those errors occurred, please leave a comment.
Run the server for the first time. This will initialize its configuration.
vncserver
You should be prompted to enter a password and get some output like:
You will require a password to access your desktops.

Password:
Verify:
Would you like to enter a view-only password (y/n)? n
xauth:  file /home/ubuntu/.Xauthority does not exist

New 'X' desktop is localhost:1

Creating default startup script /home/ubuntu/.vnc/xstartup
Starting applications specified in /home/ubuntu/.vnc/xstartup
Log file is /home/ubuntu/.vnc/localhost:1.log
Notice that it created a startup script ~/.vnc/xstartup. You’ll need to edit that file to get XFCE to work, but shut down the server first.
vncserver -kill :1
Back up the original ~/.vnc/xstartup.
mv ~/.vnc/xstartup ~/.vnc/xstartup.bak
Create a new ~/.vnc/xstartup with the following contents:
#!/bin/bash
xrdb $HOME/.Xresources
startxfce4 &
Make it executable.
chmod +x ~/.vnc/xstartup
The VNC server should work now, but VNC traffic is unencrypted, so if you care about people being able to snoop on what you’re typing (like passwords!) and whatever else you’re doing on your VNC connection, you should set up a SSH tunnel to encrypt your traffic.
3. Run the server securely
Run the VNC server such that it only accepts local connections.
vncserver -localhost
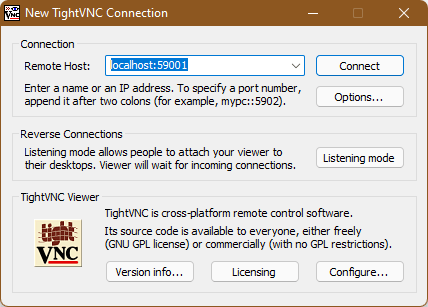
4. Securely connect to the server
Set up a SSH tunnel from your local machine to the remote server. This is how you’ll make the VNC connection “locally”.
On your local machine (the VNC client), run the following command, replacing <remote user> with your username on the server and <remote host> with the server’s hostname or IP address. You can also change 59001 to a different port if you want, but make the port isn’t already being used by another service and it’s above 1024.